Screenshots are a useful tool for capturing important information, whether it’s documents, interesting websites, or fun moments you want to share with friends. macOS offers various ways to take screenshots and automatically save them on the desktop. Here’s how you can easily create and organize screenshots.
1. Taking a Screenshot
There are several keyboard shortcuts on macOS for taking screenshots:
- Capture the entire screen: Press
Shift + Command (⌘) + 3. This will save a screenshot of your entire screen. - Capture a selected area: Press
Shift + Command (⌘) + 4. Your cursor will change to a crosshair, allowing you to select an area to capture. - Capture a window: Press
Shift + Command (⌘) + 4, followed by the space bar. Then, click on the window you wish to capture.
All screenshots are saved to your desktop by default, named with the date and time they were taken.
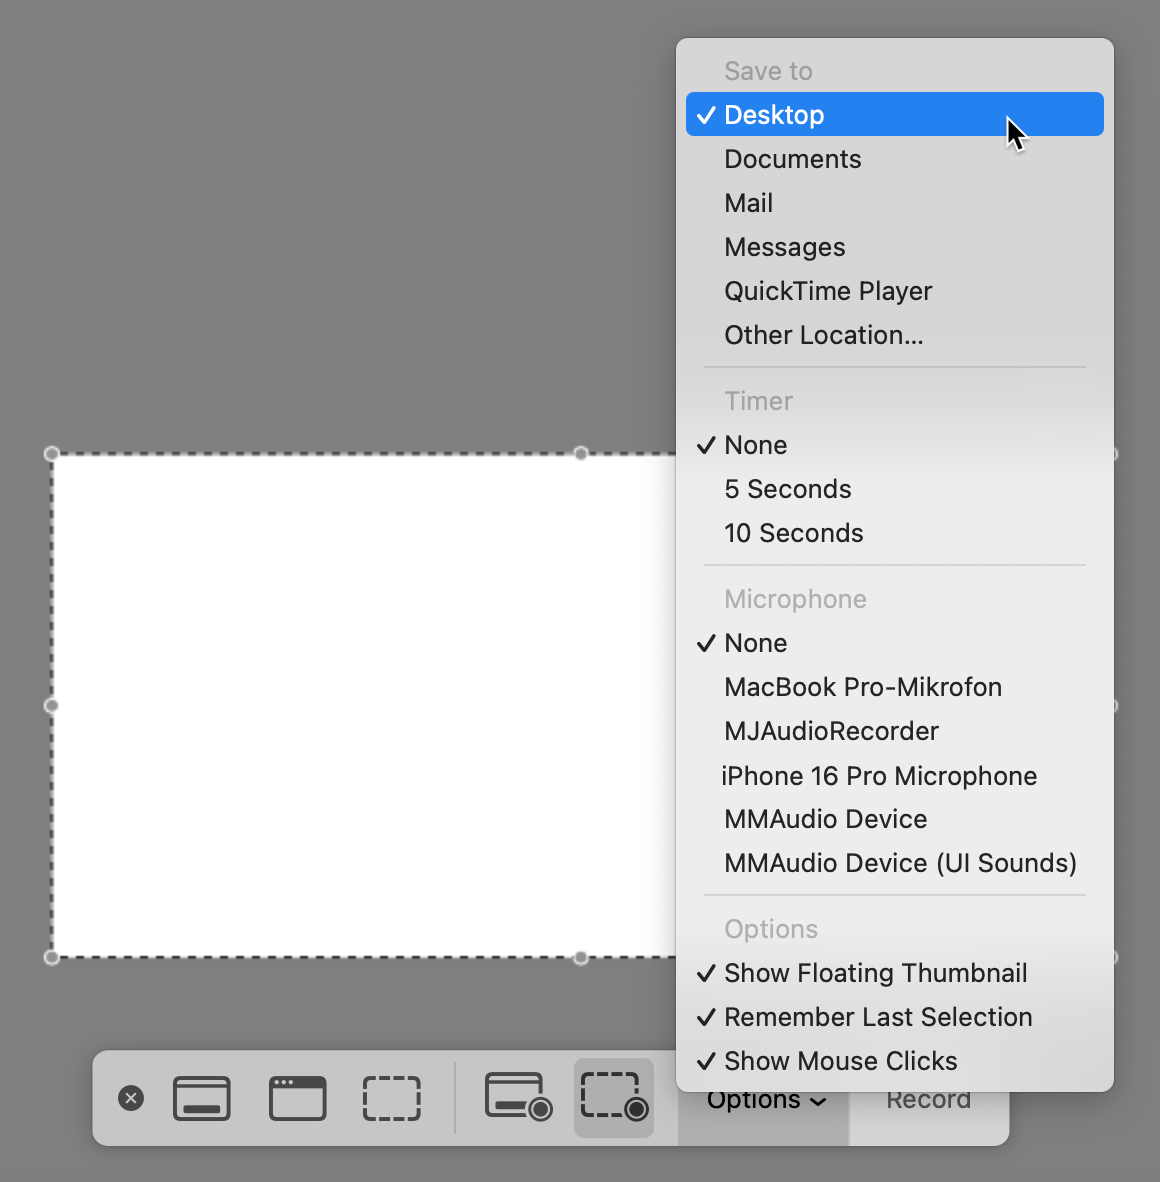
2. Changing the Save Location
If you’d prefer not to clutter your desktop, you can change the default save location:
- Open the Screenshot app by pressing
Shift + Command (⌘) + 5. - Click on “Options” in the menu at the bottom of the screen.
- Under “Save to,” select a new location, such as a specific folder or the clipboard.
3. Organizing Your Screenshots
To keep your desktop tidy, you can easily organize your screenshots. Create a folder on your desktop and regularly move your screenshots into it. Alternatively, you can use the “Stacks” feature to automatically group all screenshots in a stack on your desktop:
- Right-click on the desktop.
- Select “Use Stacks.” All screenshots will now be grouped in their own stack.
4. Tips for Managing and Using Screenshots
- Use a shortcut: If you take many screenshots, you can set a new default save location in the Screenshot app, so you don’t have to adjust it every time.
- Change the file format: You can change the screenshot file format using Terminal commands. For example, type
defaults write com.apple.screencapture type jpgto switch to JPEG format. - Automatically label screenshots: Use the “Automator” app to create a rule that automatically labels and moves your screenshots.
By following these simple steps, you can ensure your screenshots are always easy to find and organized. Enjoy capturing your favorite moments on your Mac!